Connecting selfhosted apps to Tailscale with TSDProxy
Learn how to easily connect your self-hosted applications to your Tailscale network with TSDProxy, simplifying access and management within your tailnet.
Self-hosted applications often involve juggling network configurations, firewall rules, and ensuring secure access from anywhere. Tailscale simplifies this process by creating a secure, private network—called a “tailnet”—that seamlessly connects all your devices.
In this guide, we’ll explore how to use Tailscale to integrate your self-hosted apps into your tailnet, making them accessible from anywhere with minimal configuration. We’ll also use tsdproxy to streamline access to these apps, providing a simple and efficient way to manage your services within Tailscale.
First, I want to start by giving a big thanks to the amazing Paulo Almeida for creating TSDProxy. This fantastic application makes it incredibly easy to access self-hosted apps within your tailnet, simplifying what could otherwise be a complex process.
How does it work
TSDProxy is a Docker container that allows you to seamlessly connect all your applications to your Tailscale network, also known as a tailnet. It acts as a bridge between your tailnet and your Docker containers, making each application appear on your tailnet just like any other machine. This setup enables you to access your apps by their own unique names, such as app-name.funnyname.ts.net. No need to manage DNS records or certificated. TSDProxy handles it all for your!
Tailscale Setup
Setting up Tailscale is out of scrope for this post. Chechout their Quickstart guide if needed.
In order for TSDProxy to work properly you need to make sure you have MagicDNS & HTTPS Certificates enabled in the DNS page of the admin console.
Auth key
TSDProxy needs access to your tailscale account so it can create the “machines” for all your applications. For this we will need to create Auth key in the admin console.
- Open the Admin Console
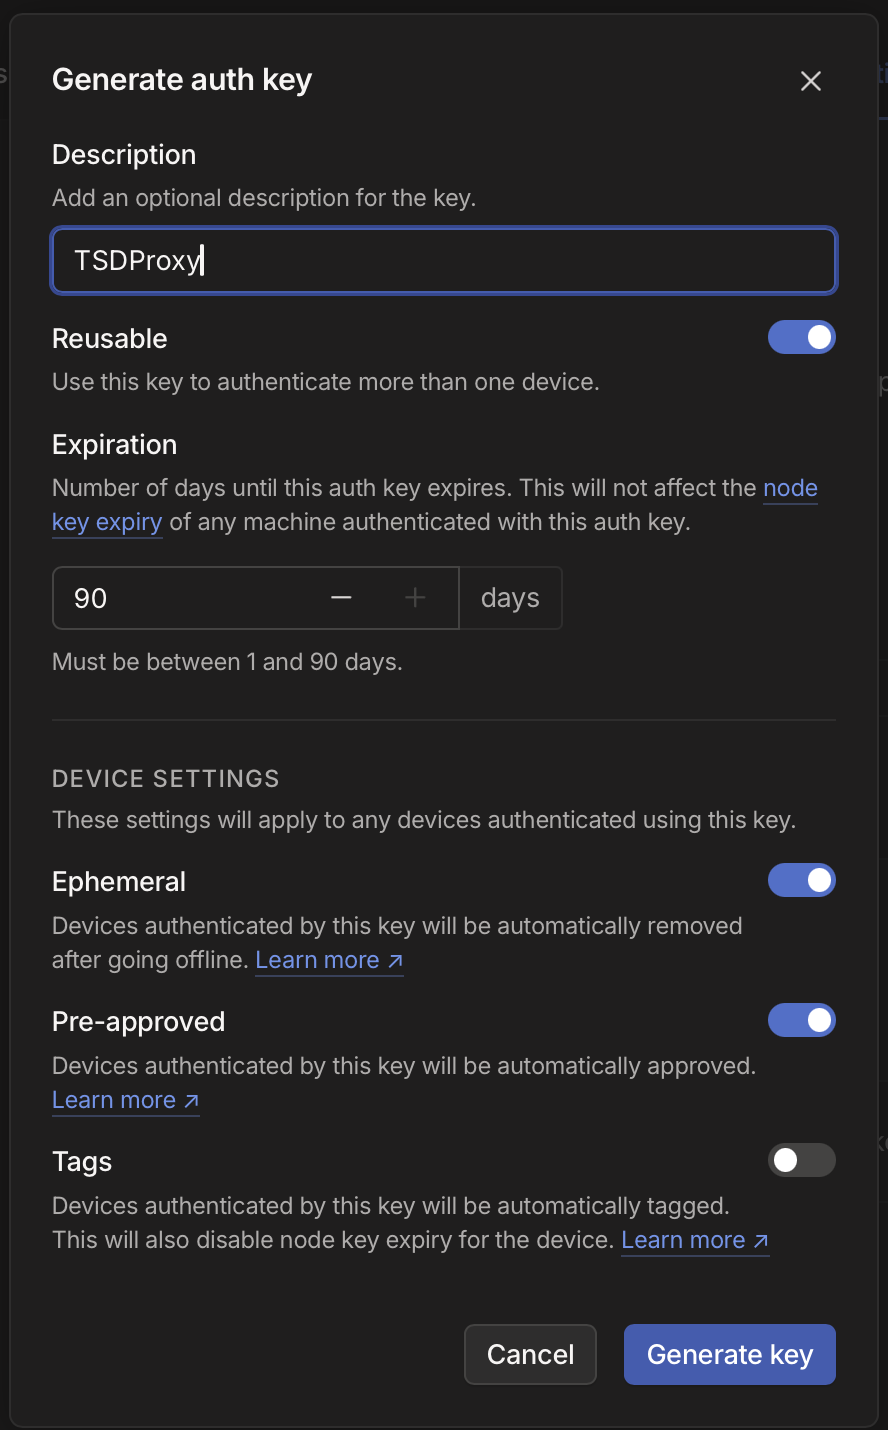
- Click on Generate auth key
- Give it a description like; TSDProxy
- Make sure you enable Reusable, Ephemeral & Pre-approved
- Optional you can enable Tags to give the application a tag by default
- Click Generate Key
- Copy the key to some place safe, we need it later on.
 Tailscale Auth Key
Your Auth key will only be valid for 90 days, after this time you will need make new one.
Instead of Auth Key you can also use the OAuth client. Downside of that one is that you need to authenticate every application manually before it can access your tailnet.
Setting up TSDProxy
To set up TSDProxy, we need to create a folder to hold both the docker-compose.yml and the configuration file.
First, create the folder for TSDProxy:
1
mkdir -p tsdproxy/config
Open a new docker-compose.yml file for editing:
1
nano tsdproxy/docker-compose.yml
Paste the following content into the file:
1
2
3
4
5
6
7
8
9
10
11
12
13
14
15
16
17
18
19
20
21
22
23
24
25
# in the config folder make a file called authkey make. Place the Tailscale authkey there.
services:
  tsdproxy:
    image: almeidapaulopt/tsdproxy
    container_name: tsdproxy
    restart: unless-stopped
    environment:
      TZ: Europe/Amsterdam
    volumes:
      - /var/run/docker.sock:/var/run/docker.sock
      - tsdproxy_data:/data
      - ./config:/config
    networks:
      - tailscale
    labels:
      - tsdproxy.enable=true
      - tsdproxy.name=tsdproxy

volumes:
  tsdproxy_data:
    name: tsdproxy_data

networks:
  tailscale:
    name: tailscale
Inside of the config folder we will make a tsdproxy.yaml which will hold the configuration for TSDProxy.
1
nano tsdproxy/config/tsdproxy.yaml
Paste the following content into the file:
1
2
3
4
5
6
7
8
9
10
11
12
13
14
15
16
17
18
19
defaultproxyprovider: default
docker:
  local:
    host: unix:///var/run/docker.sock
    defaultproxyprovider: default
tailscale:
  providers:
    default:
      authkey: ""
      authkeyfile: "/config/authkey"
      controlurl: https://controlplane.tailscale.com
  datadir: /data/
http:
  hostname: 0.0.0.0
  port: 8080
log:
  level: info
  json: false
proxyaccesslog: true
In the same folder we will make a file called authkey. This file will hold the Tailscale authkey we make earlier
1
nano tsdproxy/config/authkey
Paste the following content into the file:
1
past_your_authkey_here
Start TSDProxy
Run the command below to start the container.
1
docker compose -f tsdproxy/docker-compose.yml up -d
After the container image is pulled and started, you will see a machine in your tailnet called tsdproxy.
Adding an Application to TSDProxy
TSDProxy automatically watches the Docker socket for containers that have specific labels. To make TSDProxy pick up your applications, all you need to do is add a few labels to your Docker Compose files. These labels allow TSDProxy to identify your containers.
Add the following labels into your compose files:
1
2
3
4
labels:
  tsdproxy.enable: "true"
  tsdproxy.name: "myserver" # Optional
  tsdproxy.container_port: 8080 # Optional
Lets go quickly over these labels and what they do;
tsdproxy.enable
To enable TSDProxy for a container, simply add the label tsdproxy.enable and set it to true in your Docker Compose file.
tsdproxy.name
If you want to use a name different from the container’s name, you can specify it using the label tsdproxy.name in your Docker Compose file. This custom name will be used as the Tailscale server name, making it easier to identify and access your application within your tailnet.
tsdproxy.container_port
If you need to specify a port other than the default one, you can use the label tsdproxy.container_port in your Docker Compose file. This is especially useful when the container exposes multiple ports. By setting this label, TSDProxy will know which port to use for that container.
Note that the port used in the
tsdproxy.container_portlabel is the port used internal in the container and not the exposed port.
After adding the labels, restart your service, and TSDProxy will be activated for the container. This will automatically start the container and integrate it into your tailnet.